Distribution Groups allow you to receive mail sent to a non-personal address, e.g., “sample@potsdam.edu” in your personal InBox. It may be handy to send mail as if it came from sample@potsdam.edu. Here’s how you do that:
- Send email to itservicedesk@potsdam.edu telling them you would like the ability to “send as” the email address in question.
- If you are using OWA (Outlook on the Web):
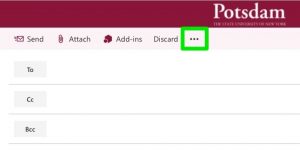
You need to activate a feature in Outlook that is not on by default. Here’s how: - Create a new mail message.
Click on the ellipsis in the menu
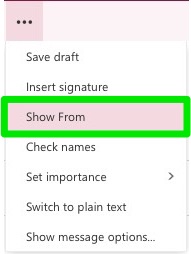
Select “Show From” from the menu that pops up:
You will now see the “From” field has been added to your new message:
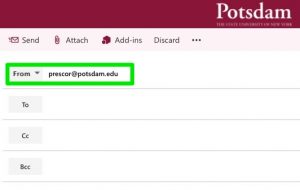
- Now that you have activated the “From” menu, it must be populated. Click once on your email address as it appears to the right of the “From” button/menu. It will not appear that you have done anything.
- Press “Delete” on your keyboard.
- Your email address has been deleted. Now start typing the email address of the account from which you want to send a message. Select/click on the desired account when it appears.
- Send a test message to yourself or to someone else.
You have just activated the “From” menu and populated it with a second address from which you can send email. If you have other address for which you have permission to send from, you can add them to the “From” menu by starting at step 5 above. You should only have to do this once for each address.
A note about signatures: If you have an email signature defined, it will by default be appended to ANY message you send, no matter which account it is sent from. You can manually delete the signature from each message as you are editing it if you would rather it not be present on any given message.
- If you are using Outlook for Windows:
- Open a new mail message.
Click on the “From” field:
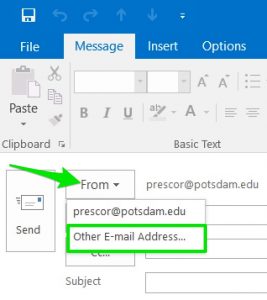
- Click on “Other Email Address…”
- Type the email address of the Shared Mailbox into the field. Click “OK”
- Continue typing and sending message.
From now on, when sending a new message, the address of the Distribution Group should be listed in the “From:” menu.
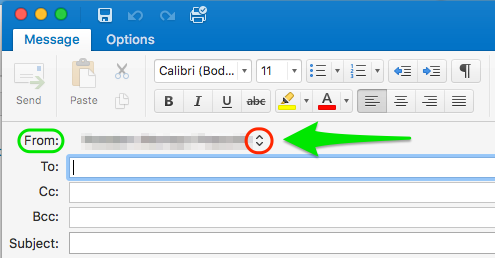
If you are using Outlook for Mac:
If you have been given privilege to send mail as another user, you will see the “From” field exposed. Click on the arrows to the right of your name to select another user (see screenshot below).